NOTE
Before we begin, ensure that you’re on the Workers paid plan to use Durable Objects.
As of 7th April 2025, Durable Objects is also avaialble in free tier. Read the announcement post here.
Background
Recently, in one of my side projects, I wanted to use Durable Objects with the SQL API which should use the same schema as my D1 database (Cloudflare’s serverless SQL database). And all this should be achieved via drizzle ORM. This post covers how I made it all work together.
But before we proceed, what are Durable Objects? A DO (Durable Object) allows you to stick some data to it which persists between requests making your app “stateful”. I think Wes too summed it up pretty neatly:
Classes that stick around
— Wes Bos (@wesbos) February 24, 2025
The complete code can be found on my GitHub. All the links which helped me fix some pain points are mentioned in the README and are also at the bottom of this post.
Project and environment setup
Project setup with Hono
We’ll begin by creating a Hono app. I’m using Bun as my package manager.
I’ll run bun create hono@latest to begin scaffolding the app.
- Give your app a name. I gave do-d1-drizzle.
- Choose cloudflare-workers as your template.
- Choose your package manager. I chose bun.
- Install the dependencies.
Install these additional dependencies: bun add better-sqlite3 dotenv drizzle-orm && bun add -D drizzle-kit.
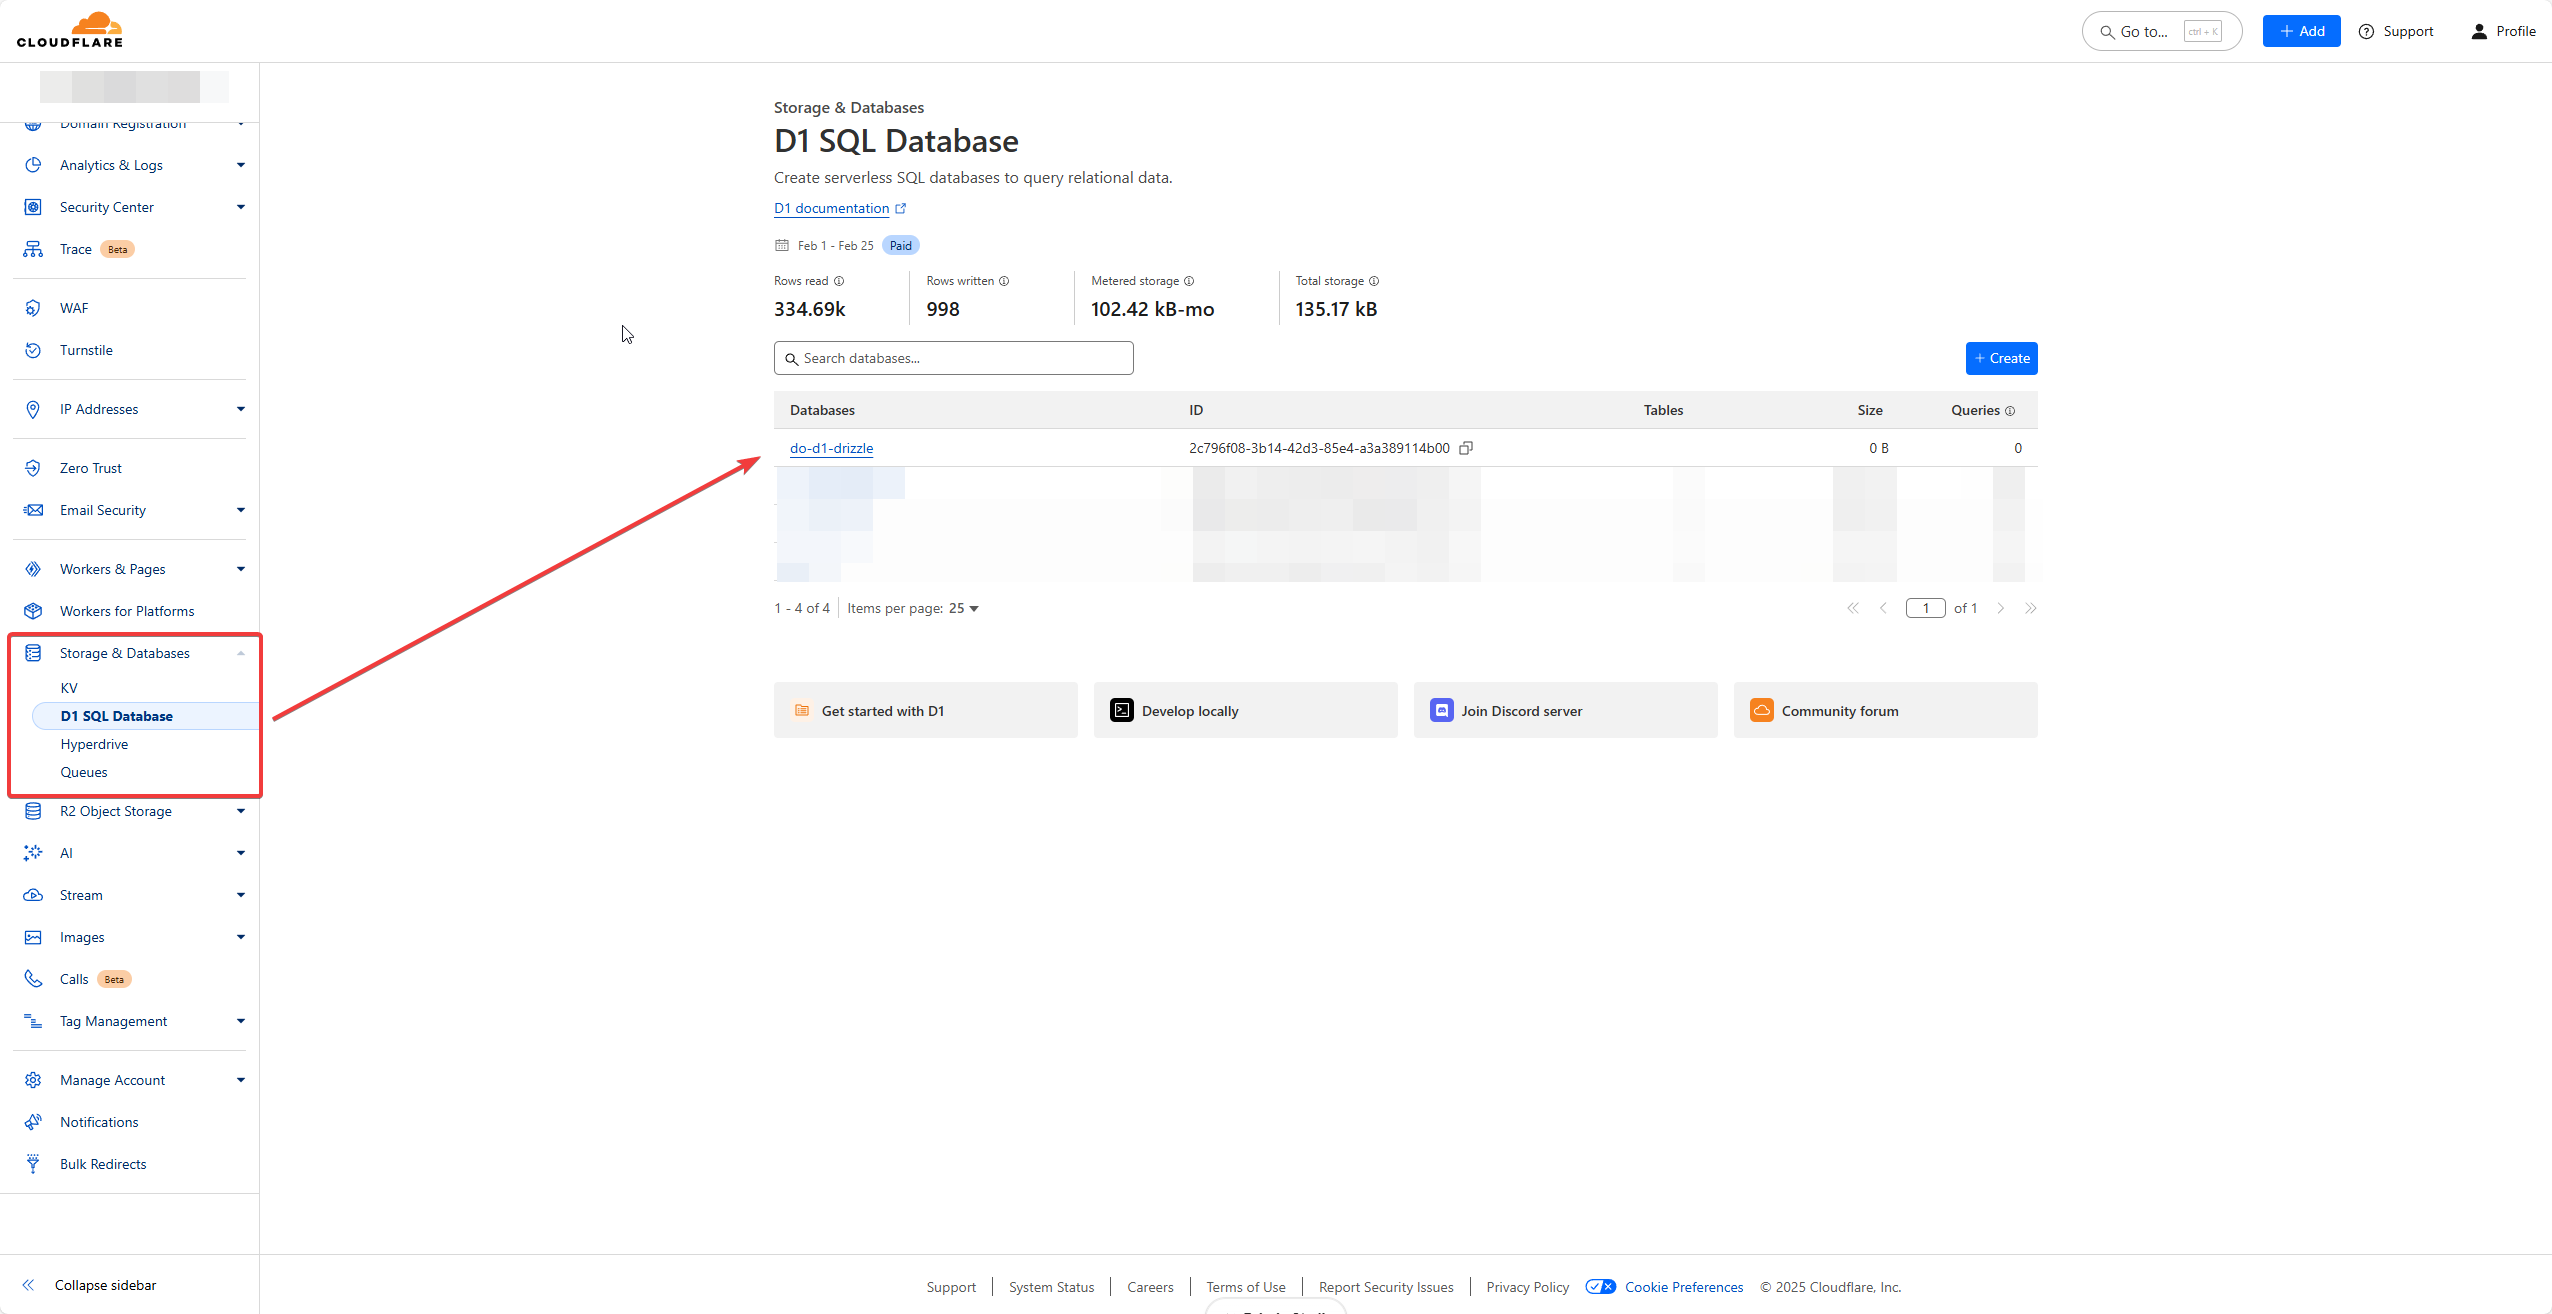
Then, go to your Cloudflare dashboard and create a D1 database.
Update your wrangler.jsonc with the below config
{
  "$schema": "node_modules/wrangler/config-schema.json",
  "name": "do-d1-drizzle",
  "main": "src/index.ts",
  "compatibility_date": "2025-02-25",
  "d1_databases": [
    {
      "binding": "DO_D1_DB",
      "database_name": "do-d1-drizzle",
      "database_id": "2c796f08-3b14-42d3-85e4-a3a389114b00",
      "migrations_dir": "drizzle/migrations",
      "migrations_table": "__drizzle_migrations",
    },
  ],
}binding- can be any name via which you want to access the database.database_name- the name given while creating the database.database_id- the id generated after the database is created.migrations_dir- the directory where drizzle would generate it’s migrations which D1 should refer.migrations_table- the table under which information regarding migrations should be stored.
Under your src directory, create a types.ts file with the below content
export type Env = {
  Bindings: {
    DO_D1_DB: D1Database;
  };
};
Also, create a db directory and add two files: index.ts and schema.ts. Taking reference of the offical drizzle guide for D1, we’ll create 2 tables with simple data models: userTable and a postTable
schema.ts
import { relations } from 'drizzle-orm';
import { int, sqliteTable, text } from 'drizzle-orm/sqlite-core';

export const userTable = sqliteTable('user_table', {
  id: int().primaryKey({ autoIncrement: true }),
  name: text().notNull(),
});

export const postTable = sqliteTable('post_table', {
  id: int().primaryKey({ autoIncrement: true }),
  title: text().notNull(),
  content: text().notNull(),
  userId: int().references(() => userTable.id),
});

export const userRelations = relations(userTable, ({ many }) => ({
  posts: many(postTable),
}));

export const postRelations = relations(postTable, ({ one }) => ({
  user: one(userTable, {
    fields: [postTable.userId],
    references: [userTable.id],
  }),
}));
index.ts
import { drizzle } from 'drizzle-orm/d1';

import type { Env } from '../types';
import * as schema from './schema';

export function createDB(env: Env['Bindings']) {
  const db = drizzle(env.DO_D1_DB, { schema });
  return db;
}
We’ll now have to update our package.json with these scripts:
  "scripts": {
    "dev": "wrangler dev",
    "deploy": "wrangler deploy --minify",
    "db:generate": "drizzle-kit generate",
    "db:migrate": "wrangler d1 migrations apply DO_D1_DB --local",
    "db:studio": "LOCAL_DB_PATH=$(find .wrangler/state/v3/d1/miniflare-D1DatabaseObject -type f -name '*.sqlite' -print -quit) drizzle-kit studio"
},db:generate- this will generate migrations based on the schema and the changes you make. Each time any modifications are made to the schema, this has to run.db:migrate- this will apply the migrations on the local D1 instance. This won’t update your remote D1 since wrangler emulates the bindings which you’re using (apart from AI) for you to test locally w/o deploying to their network. This too would have to be run, each time any modifications are made to the schema.db:studio- since the D1 instance is local, we can view it viadrizzle-kit studiocommand. This basically finds the latest sqlite instance in the wrangler directory and assigns it toLOCAL_DB_PATH. This will be used in thedrizzle.config.tswhich we’ll be creating later on.
Tokens and IDs
We’re going to create some tokens and get some ids to get it all working together since we’re going to use GitHub Actions to deploy our Worker to Cloudflare.
Account and D1 IDs
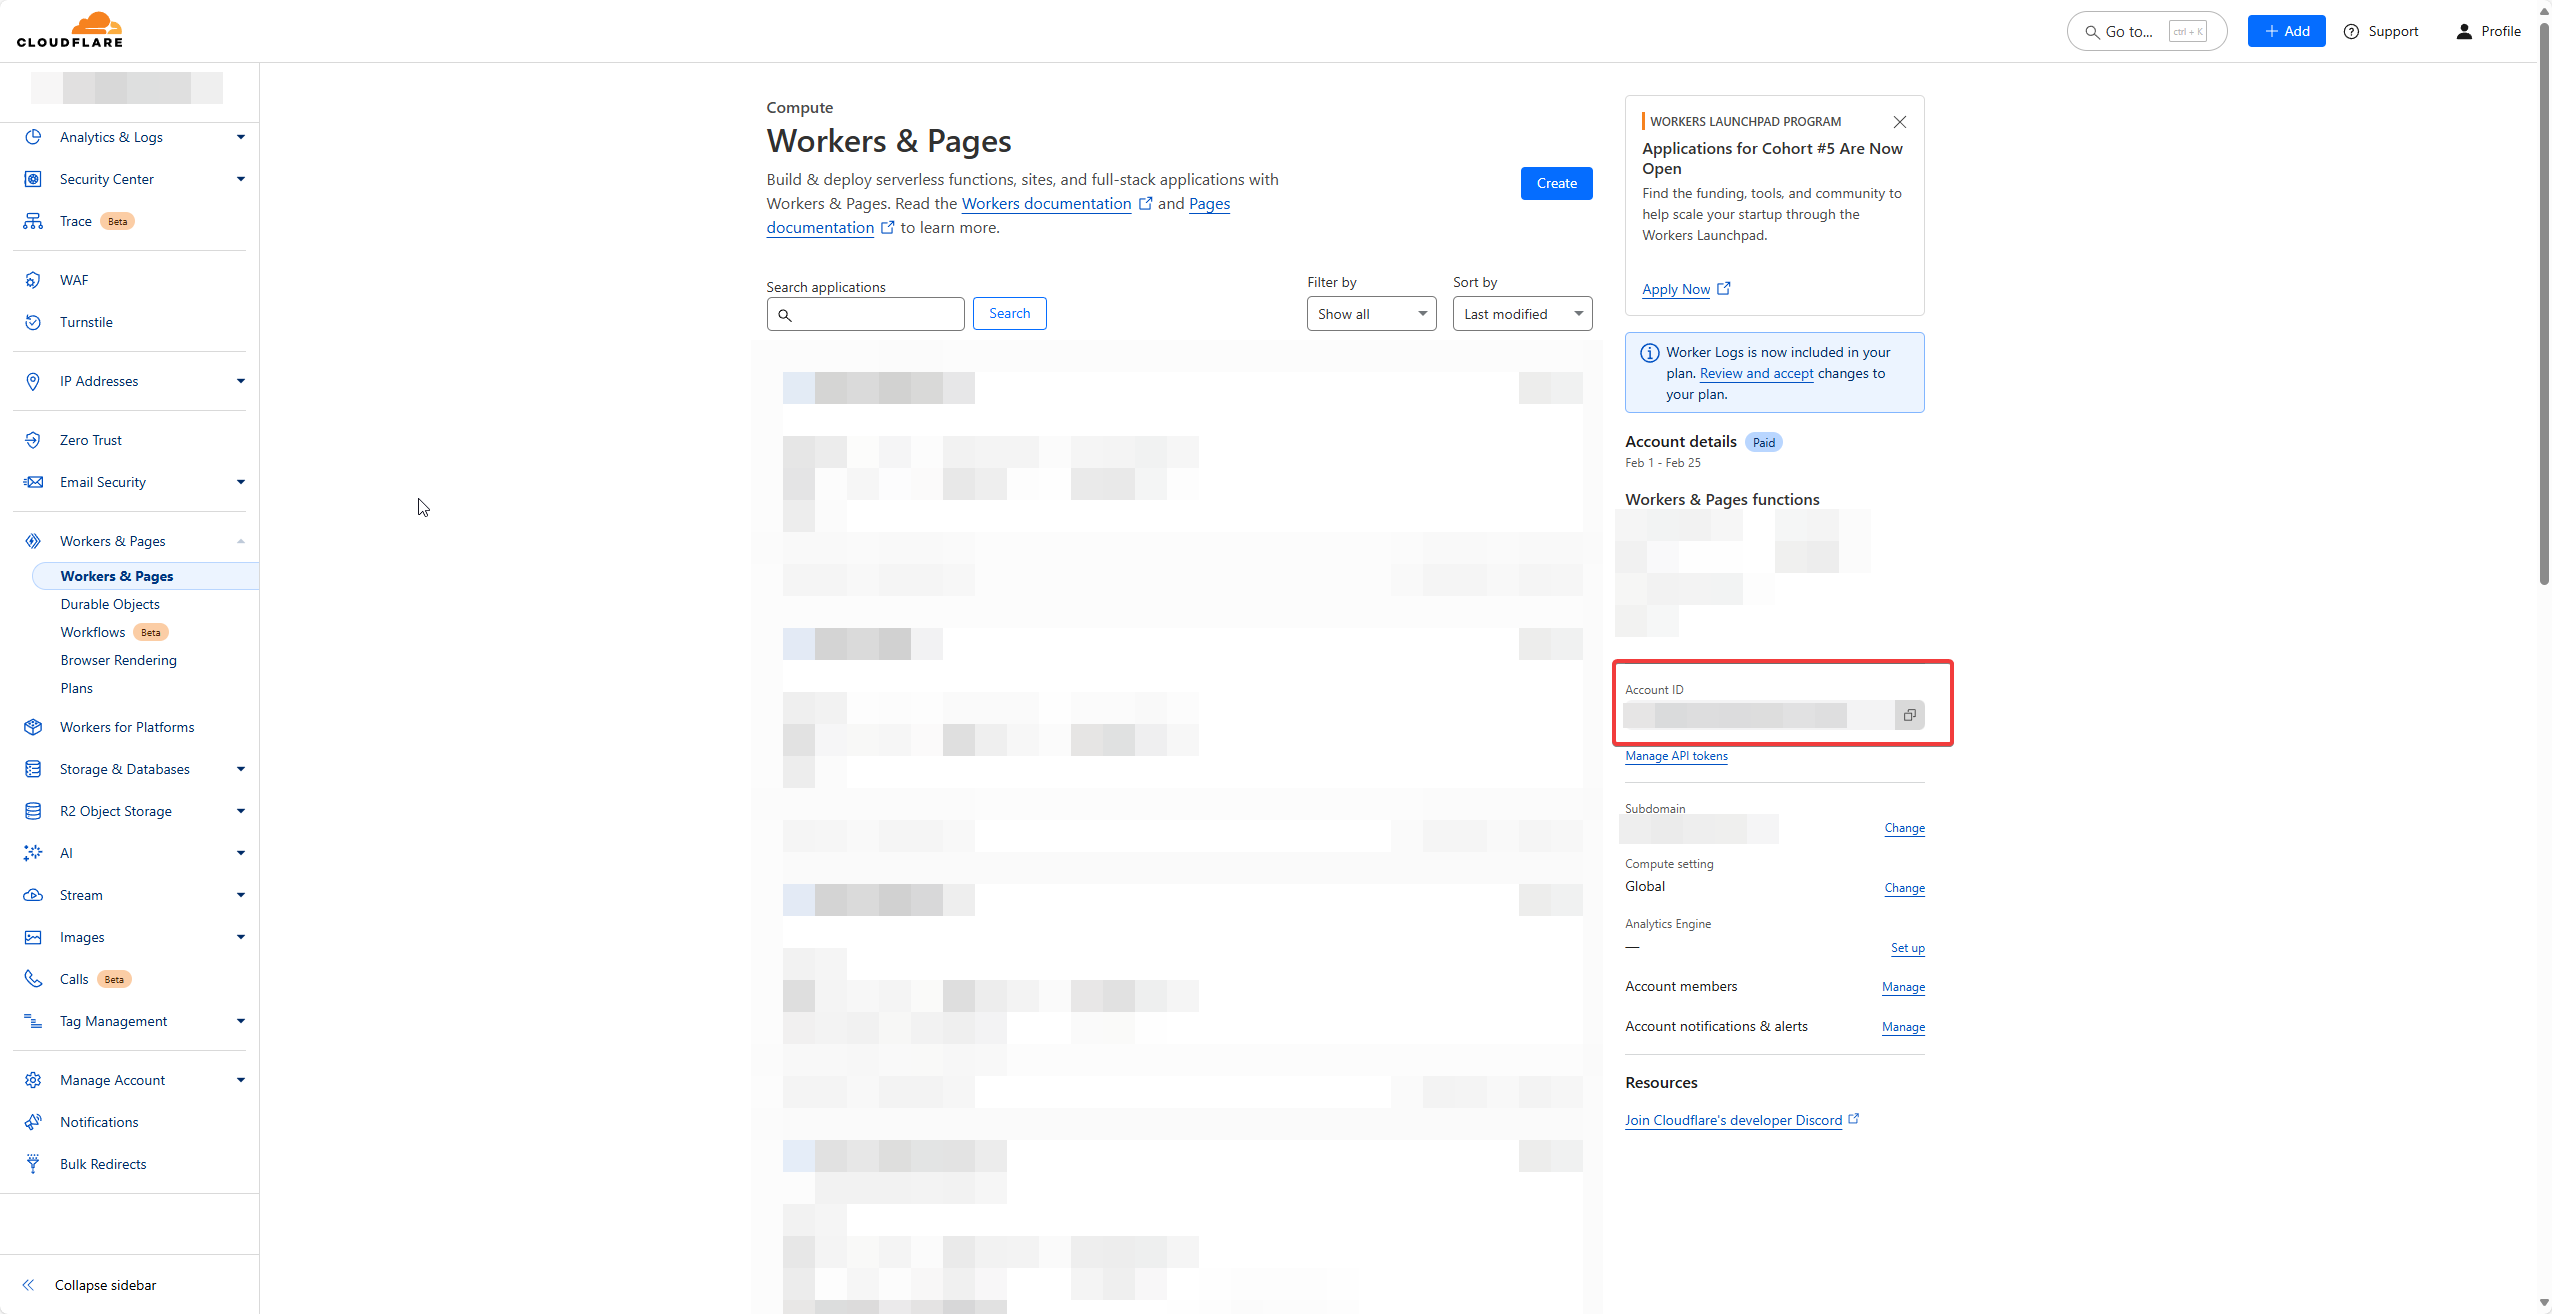
- Log into Cloudflare dashboard, go to Workers & Pages and make a note of the Account ID visible at the right side.
- Make a note of the D1 database id which you created in the earlier step. You can refer the same from
wrangler.jsoncas well.
We’ll now create 2 tokens: a D1 token and a deployment token.
D1 token
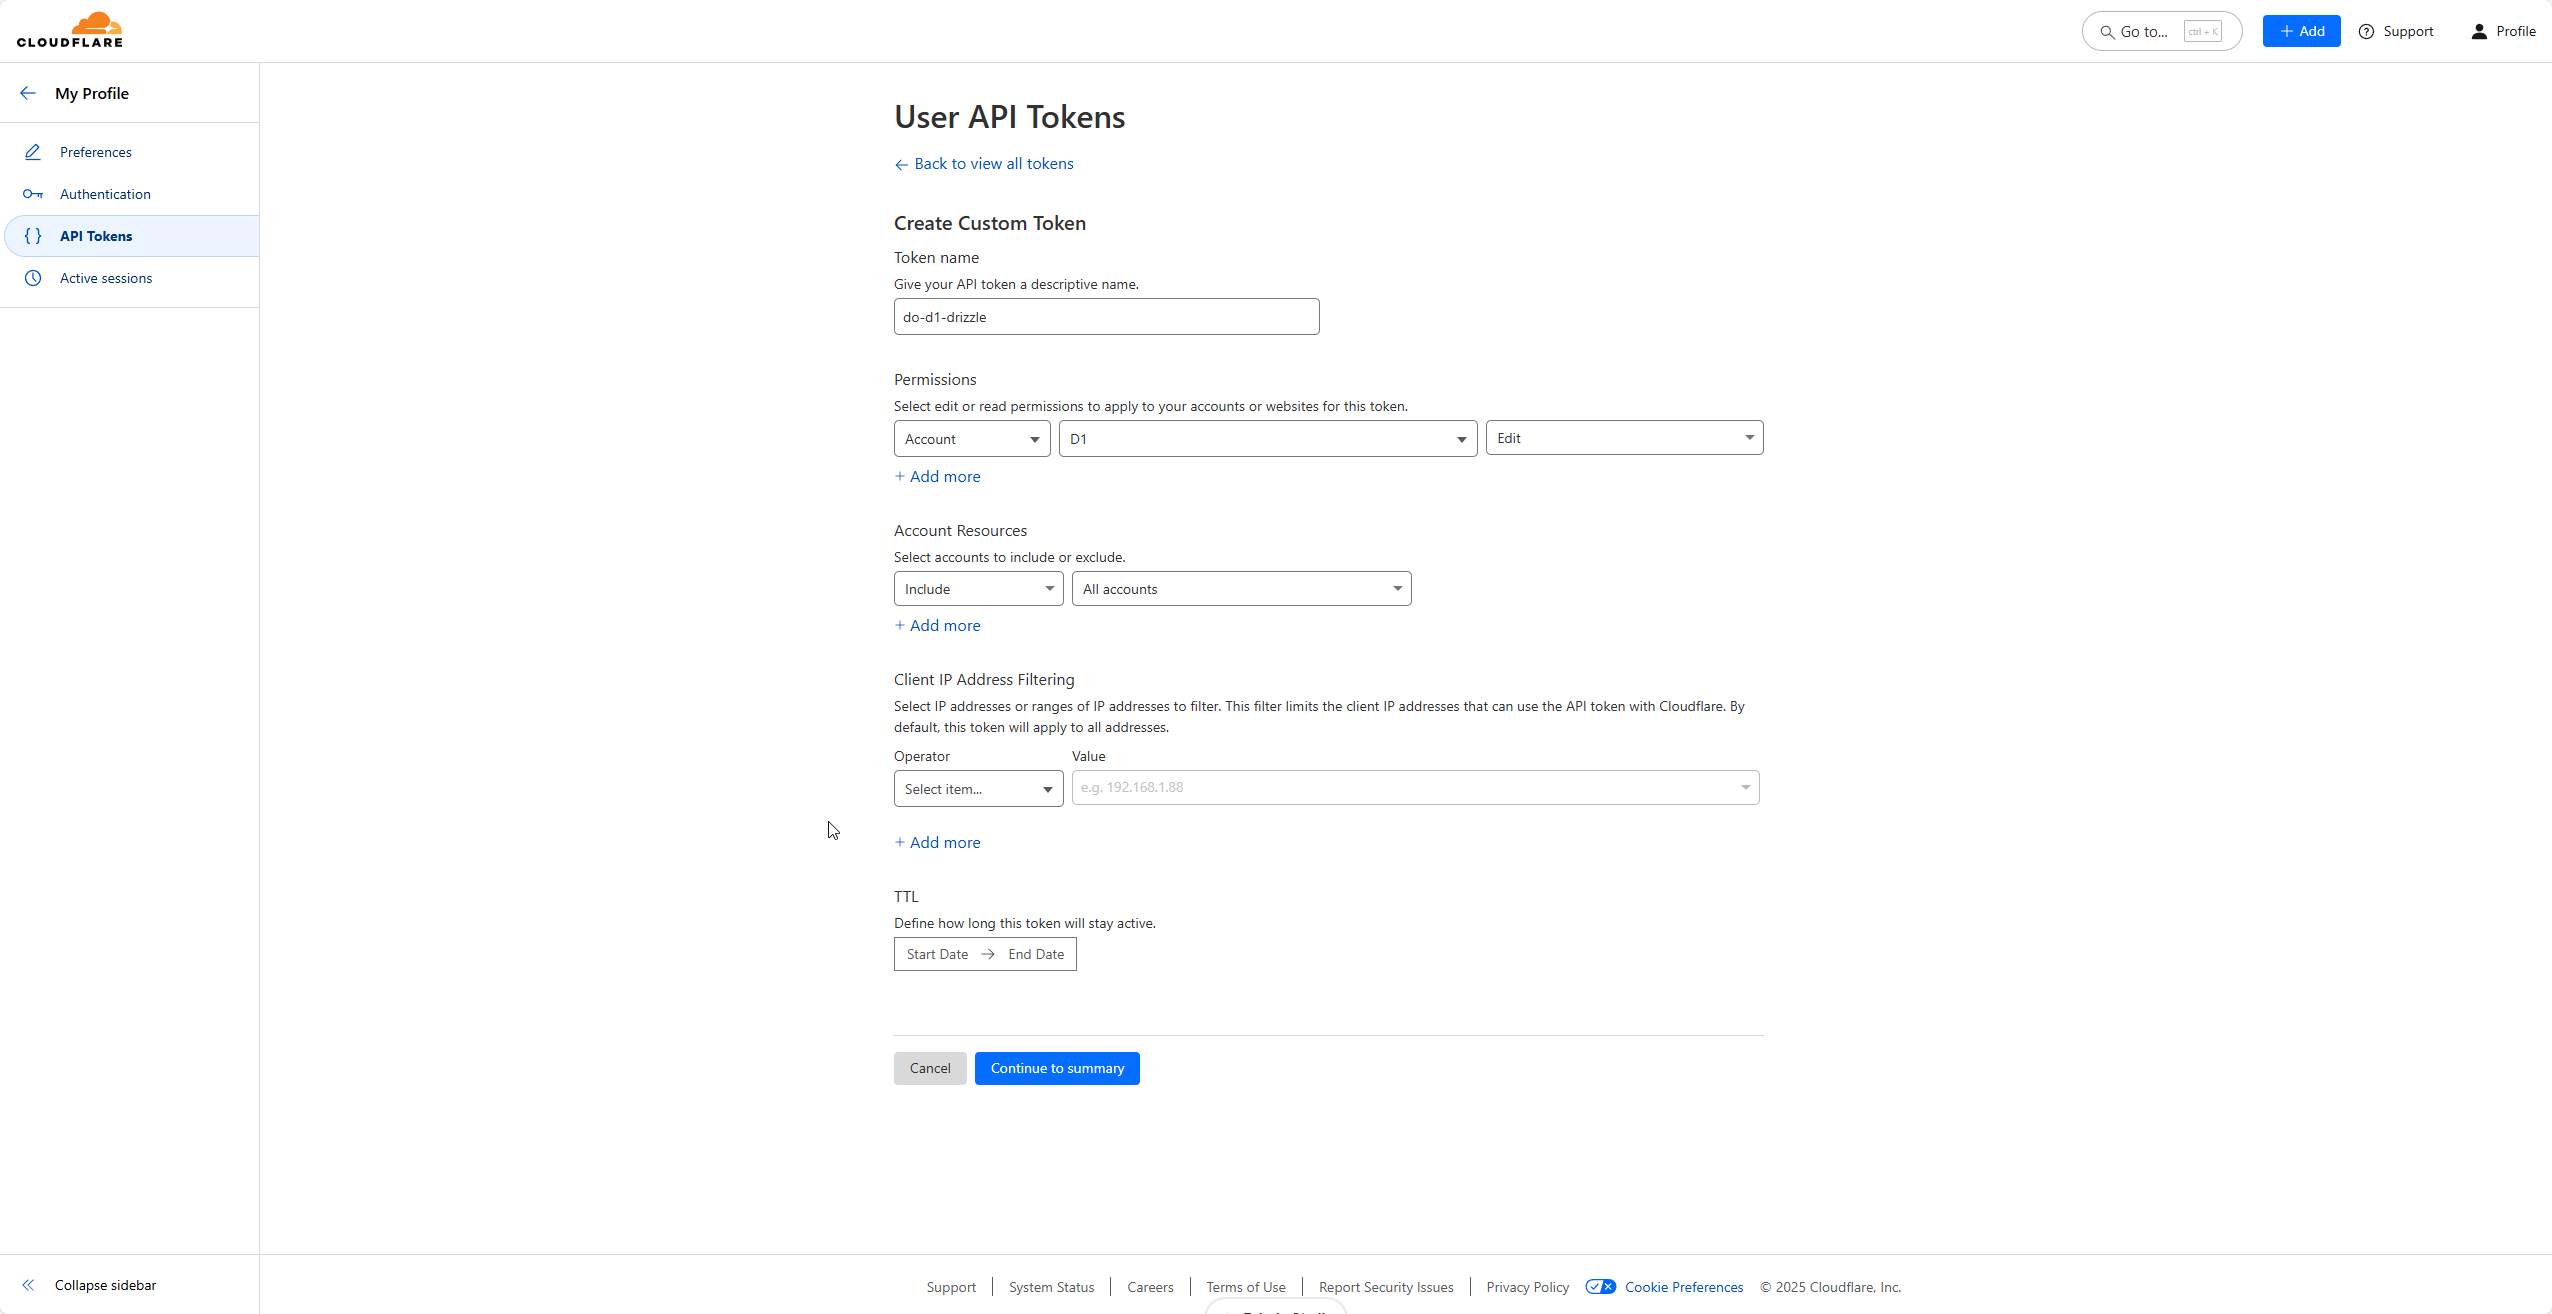
- To create D1 token, visit: API Tokens.
- Click on Create Token and then click on Get Started at the bottom.
- Give it a name. Then under permissions, select Account then D1 then Edit.
- Click on Continue to summary and then Create Token.
- Make a note of this token as this won’t be shown again after you navigate away from this screen.
Workers token
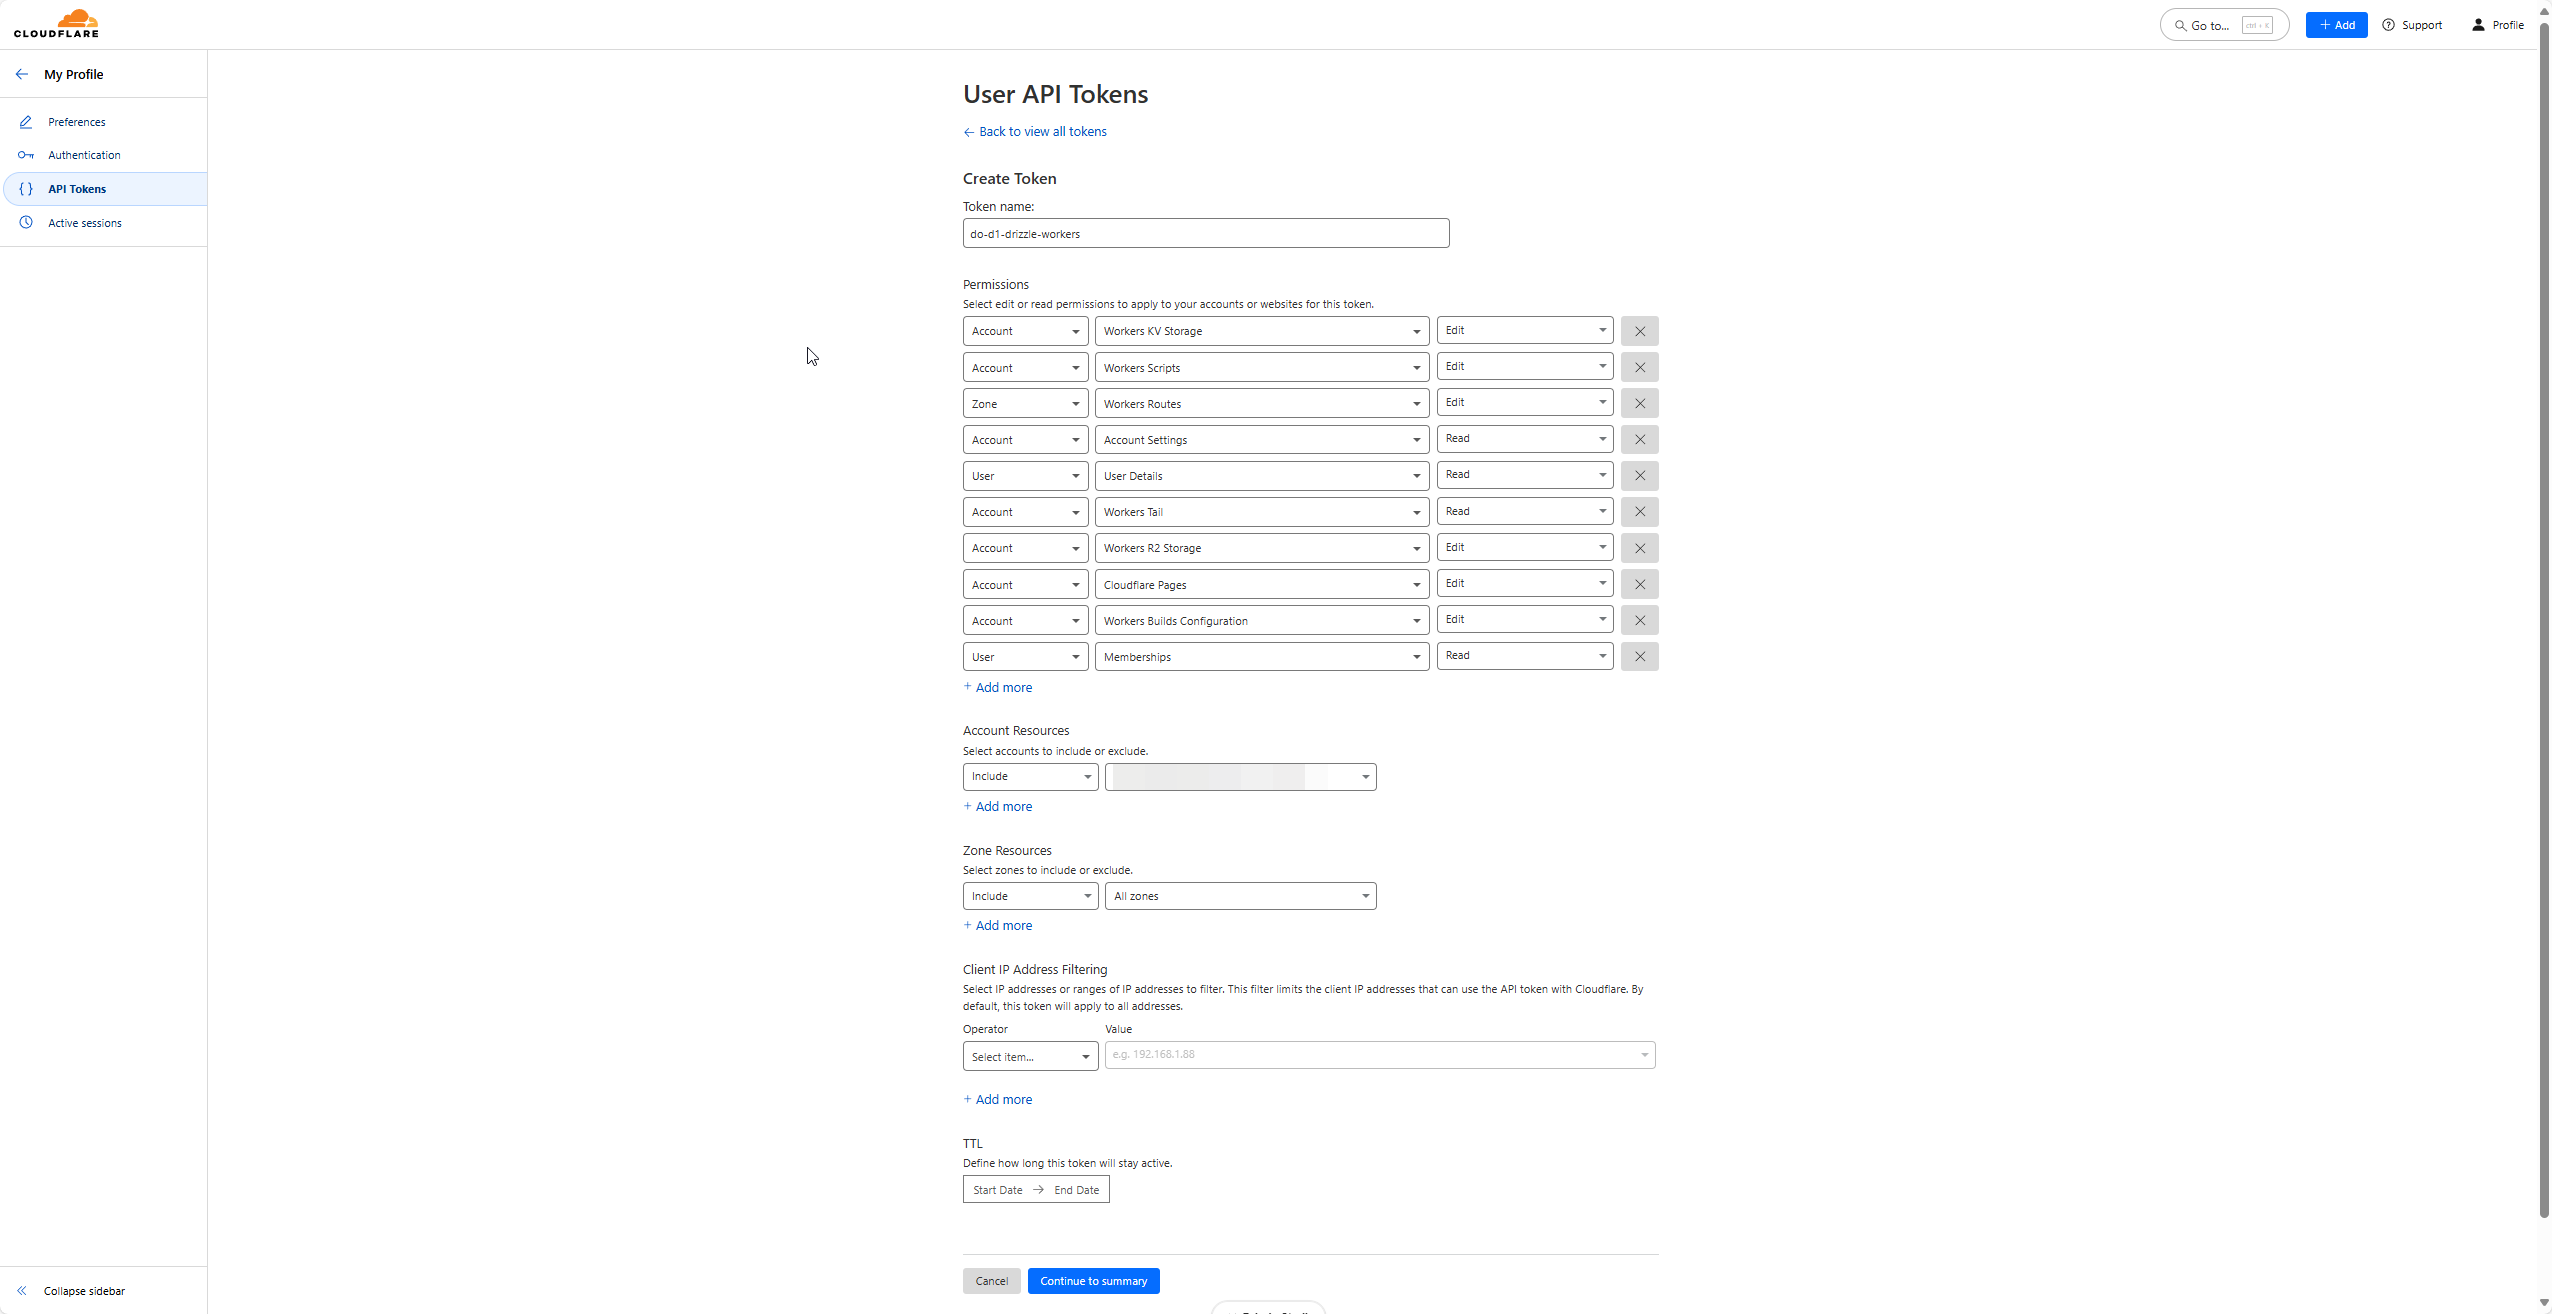
- To create Workers deployment token, visit: API Tokens.
- Click on Create Token and then click on Use template besides Edit Cloudflare Workers.
- Give it a name. Then under Account Resources, select your account.
- Click on Continue to summary and then Create Token.
- Make a note of this token as this won’t be shown again after you navigate away from this screen.
For secret environment variables, it is recommended to use .dev.vars file instead of .env while working with Workers. So create a .dev.vars file at the root (outside src) with the below content
CLOUDFLARE_ACCOUNT_ID=YOUR_ACCOUNT_ID
CLOUDFLARE_DATABASE_ID=YOUR_DATABASE_ID
CLOUDFLARE_D1_TOKEN=YOUR_D1_TOKEN
The Workers deployment token will come into picture later.
In the root directory, create a drizzle.config.ts file with the below content:
import { config } from 'dotenv';
import { defineConfig } from 'drizzle-kit';

config({ path: '.dev.vars' });

export default process.env.LOCAL_DB_PATH
  ? {
      schema: './src/db/schema.ts',
      dialect: 'sqlite',
      dbCredentials: {
        url: process.env.LOCAL_DB_PATH,
      },
    }
  : defineConfig({
      schema: './src/db/schema.ts',
      dialect: 'sqlite',
      out: './drizzle/migrations',
      driver: 'd1-http',
      dbCredentials: {
        accountId: process.env.CLOUDFLARE_ACCOUNT_ID!,
        databaseId: process.env.CLOUDFLARE_DATABASE_ID!,
        token: process.env.CLOUDFLARE_D1_TOKEN!,
      },
});config- by default it looks for.envfile. Since we have our variables in.dev.vars, we need to specify the correct path.- The first condition becomes true when you’re running the
db:studiocommand. It goes in the else block when thedb:migratecommand is run. - Check the
dialectanddriverkeys. Duringdb:studio, we do not needd1-httpdriver as we’re just running thedrizzle-kit studioUI to see what all there is in our DB.
D1 setup
Alright! We can now run the scripts one by one to see whether our D1 configuration is good to go or not. Run the following commands one by one.
bun db:generate
This was the console output for me:
$ drizzle-kit generate
No config path provided, using default 'drizzle.config.ts'
Reading config file '/home/flashblaze/projects/do-d1-drizzle/drizzle.config.ts'
2 tables
post_table 4 columns 0 indexes 1 fks
user_table 2 columns 0 indexes 0 fks

[✓] Your SQL migration file ➜ drizzle/migrations/0000_tough_slyde.sql
This would have also created a drizzle folder with a single migration. Below is how it looks for me. The migration name would be different for you, but the structure should be pretty much the same
drizzle/
├─ migrations/
│  ├─ meta/
│  │  ├─ _journal.json
│  │  ├─ 0000_snapshot.json
│  ├─ 0000_tough_slyde.sql
node_modules/
src/
.dev.vars
.gitignore
bun.lock
drizzle.config.ts
package.json
README.md
tsconfig.json
wrangler.jsonc
If a migrations.js is not created under drizzle/migrations, create one with the below content. Note that you might have to replace the migration file name with the one which has been generated
import m0000 from './0000_tough_slyde.sql';

import journal from './meta/_journal.json';

export default {
  journal,
  migrations: {
    m0000,
  },
};
Now to apply the migrations, run the below command.
bun db:migrate
Upon running it, you will get a confirmation prompt. Press y to proceed and it should look something like this
$ wrangler d1 migrations apply DO_D1_DB --local
⛅️ wrangler 3.109.3
--------------------
Migrations to be applied:
┌──────────────────────┐
│ name │
├──────────────────────┤
│ 0000_tough_slyde.sql │
└──────────────────────┘
✔ About to apply 1 migration(s)
Your database may not be available to serve requests during the migration, continue? … yes
🌀 Executing on local database DO_D1_DB (2c796f08-3b14-42d3-85e4-a3a389114b00) from .wrangler/state/v3/d1:
🌀 To execute on your remote database, add a --remote flag to your wrangler command.
🚣 3 commands executed successfully.
┌──────────────────────┬────────┐
│ name │ status │
├──────────────────────┼────────┤
│ 0000_tough_slyde.sql │ ✅ │
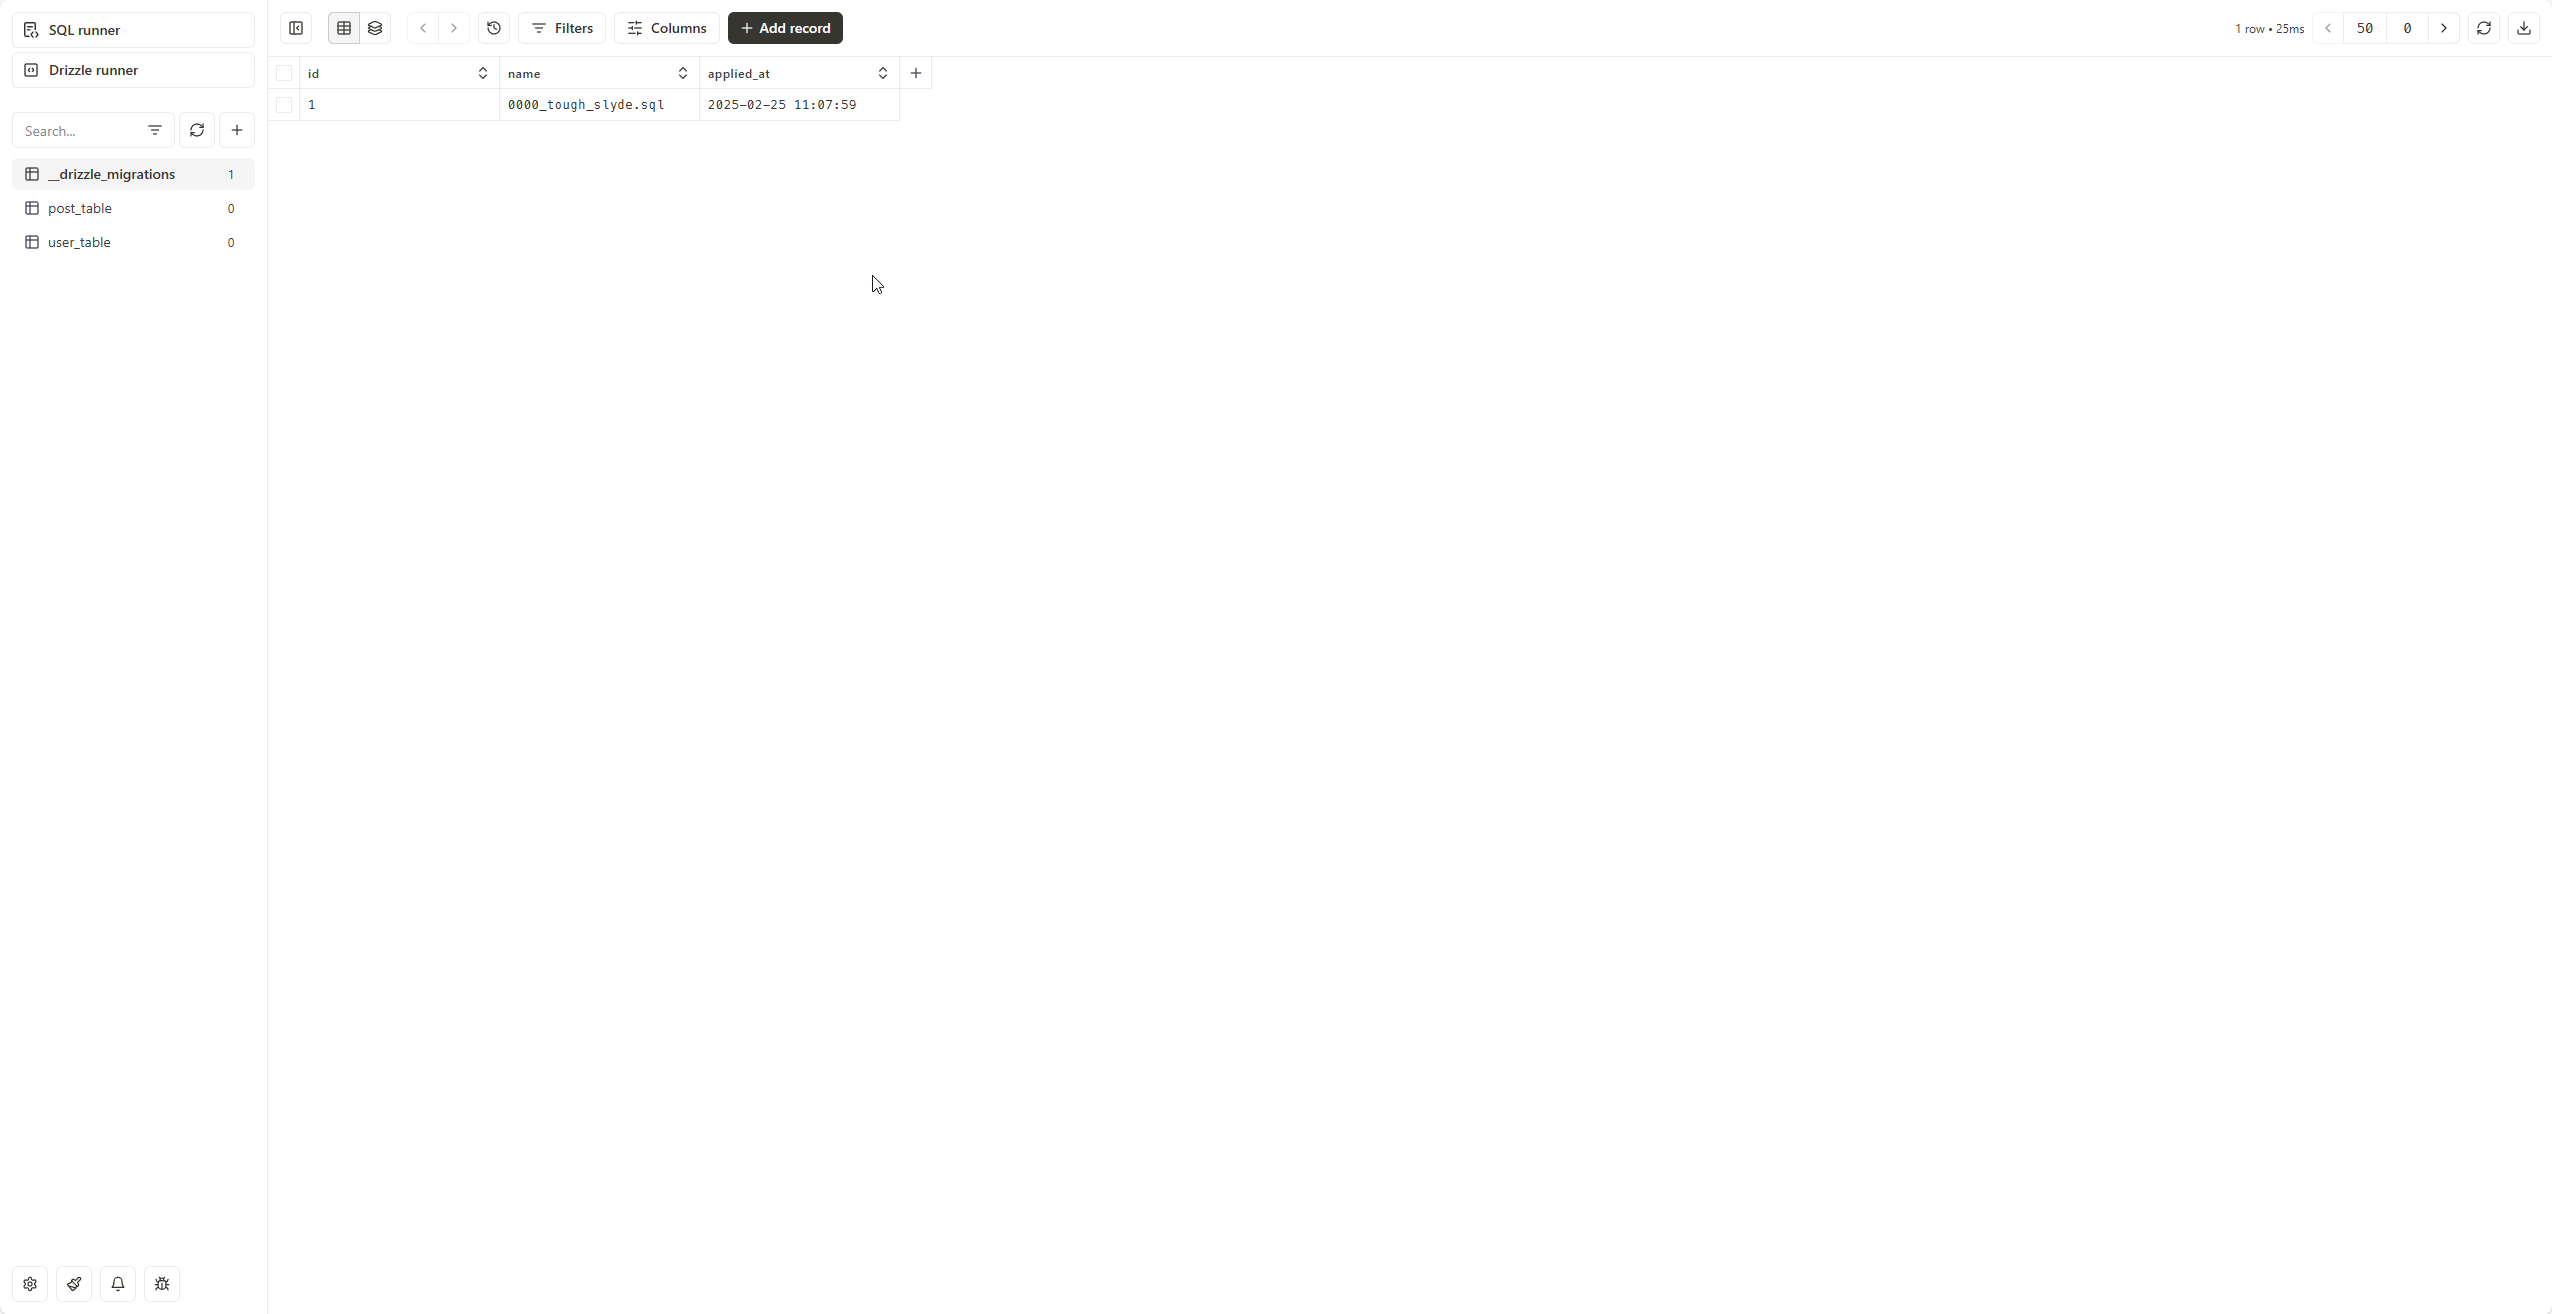
└──────────────────────┴────────┘To view the database, run
bun db:studio
Visit https://local.drizzle.studio. It would look something like this
D1 deployment
We’ll now set up GitHub Actions to deploy the Worker when it is pushed to the main branch. For this, create a workflow.yml file under .github/workflows directory with this content
name: Deploy Worker
on:
  push:
    branches:
      - main
    paths:
      - '.github/workflows/workflow.yml'

jobs:
  deploy:
    runs-on: ubuntu-latest
    timeout-minutes: 60
    steps:
      - uses: actions/checkout@v4

      - name: Setup Node.js
        uses: actions/setup-node@v4
        with:
          node-version: '20.17.0'

      - name: Install Bun
        uses: oven-sh/setup-bun@v1
        with:
          bun-version: latest

      - name: Install dependencies
        run: bun install

      - name: Deploy API to Cloudflare
        uses: cloudflare/wrangler-action@v3
        with:
          apiToken: ${{ secrets.CLOUDFLARE_API_TOKEN }}
          accountId: ${{ secrets.CLOUDFLARE_ACCOUNT_ID }}
          command: deploy

      - name: Apply D1 Migrations
        uses: cloudflare/wrangler-action@v3
        with:
          apiToken: ${{ secrets.CLOUDFLARE_D1_TOKEN }}
          accountId: ${{ secrets.CLOUDFLARE_ACCOUNT_ID }}
command: d1 migrations apply DO_D1_DB --remote- We’re using Node version 20.17.0 and installing bun via their action
- Next we’re deploying to Cloudflare using their action. As you can see we’re referring
CLOUDFLARE_API_TOKEN,CLOUDFLARE_ACCOUNT_IDandCLOUDFLARE_D1_TOKEN. We already have these variables which we’ve taken a note of in the earlier step
Since the above action is referring these variables, we need to put them in our GitHub repo. As such, go to Secrets and variables under your repo Settings, click on New repository secret and add these values respectively under Actions. After pushing all these changes to your repo, your Worker should be deployed successfully! 🎉
Now let’s move on to DO part.
DO setup
Config and class
Update your wrangler.jsonc with the below one. I’m only attaching the part related to the DO
 "durable_objects": {
    "bindings": [
      {
        "name": "DO_D1_DO",
        "class_name": "SampleObject"
      }
    ]
  },
  "migrations": [
    {
      "tag": "v1",
      "new_sqlite_classes": ["SampleObject"]
    }
  ],
  "rules": [
    {
      "type": "Text",
      "globs": ["**/*.sql"],
      "fallthrough": true
    }
]- For SQL backend, DO requires the config in the above pattern. Refer drizzle guide.
SampleObjectis the name of the class which we’ll be creating in the next step.
Create a sample-durable.ts file inside src with the below content:
/// <reference types="@cloudflare/workers-types" />
import { DurableObject } from 'cloudflare:workers';
import {
  type DrizzleSqliteDODatabase,
  drizzle,
} from 'drizzle-orm/durable-sqlite';
import { migrate } from 'drizzle-orm/durable-sqlite/migrator';

import { userTable } from './db/schema';
import type { Env } from './types';

import migrations from '../drizzle/migrations/migrations.js';

export class SampleObject extends DurableObject {
  storage: DurableObjectStorage;
  db: DrizzleSqliteDODatabase;

  constructor(ctx: DurableObjectState, env: Env) {
    super(ctx, env);
    this.storage = ctx.storage;
    this.db = drizzle(this.storage, { logger: false });
  }

  async migrate() {
    await migrate(this.db, migrations);
  }

  async insert({ name }: { name: string }) {
    return await this.db.insert(userTable).values({ name }).returning();
  }

  async getUsers() {
    return await this.db.select().from(userTable);
  }
}-
We’re exporting the
SampleObjectclass which we’ve referenced inwrangler.jsonc. -
In the
constructorwe’re assigningstorageanddbusing drizzle. Refer the guide. -
Then, we’ve created 3 methods:
migrate- which we’ll be calling in ourworkflow.ymlto keep it in sync with our schema based on themigrationswhich we’re importing.insert- which we’ll be calling inside our API route to add an user.getUsers- which we’ll be calling inside our API route to get all the users.
Update the types.ts with the following
import { SampleObject } from './sample-durable';

export type Env = {
  Bindings: {
    DO_D1_DB: D1Database;
    DO_D1_DO: DurableObjectNamespace<SampleObject>;
  };
  Variables: {
    stub: DurableObjectStub<SampleObject>;
  };
};
Migrations and data entry
Everything now in place, we need to create some endpoints to interact with D1 as well as with DO. Update your src/index.ts with the following
import { Hono } from 'hono';
import { Env } from './types';
import { createDB } from './db';
import { userTable } from './db/schema';
import { SampleObject } from './sample-durable';

const app = new Hono<Env>();

app
  .get('/', c => {
    return c.text('Hello Hono!');
  })
  .get('/migrate', async c => {
    const durableObject = c.env.DO_D1_DO.idFromName('do-d1-drizzle');
    const durableObjectStub = c.env.DO_D1_DO.get(durableObject);
    await durableObjectStub.migrate();
    return c.json({
      message: 'Migrated!',
    });
  })
  .get('/create', async c => {
    const db = createDB(c.env);
    const dbUser = await db
      .insert(userTable)
      .values({ name: `db-user-${new Date().toISOString()}` })
      .returning()
      .get();

    const durableObject = c.env.DO_D1_DO.idFromName('do-d1-drizzle');
    const durableObjectStub = c.env.DO_D1_DO.get(durableObject);
    const doUser = await durableObjectStub.insert({
      name: `do-user-${new Date().toISOString()}`,
    });

    return c.json({ dbUser, doUser });
  })
  .get('/users', async c => {
    const db = createDB(c.env);
    const dbUsers = await db.select().from(userTable);

    const durableObject = c.env.DO_D1_DO.idFromName('do-d1-drizzle');
    const durableObjectStub = c.env.DO_D1_DO.get(durableObject);
    const doUsers = await durableObjectStub.getUsers();

    return c.json({ dbUsers, doUsers });
  });

export { SampleObject };

export default app;- We’re typing the Hono instance with the
Envto get type hints /migrateendpoint has to be hit once the app is running/deployed to migrate the DO SQL backend. This endpoint is using themigratemethod which we created/createendpoint creates an user in D1 and DO and returns both the records/usersendpoint fetches all the users from D1 and DO- We’re also named exporting
SampleObjectsince DO looks for it in the main file which we’re running. In our case it issrc/index.ts
CAUTION
The migrate endpoint should have some kind of auth like maybe a custom header which the app would check before migrating to prevent unnecessary DO hits.
Test test test
- Run
bun devwhich will run the app on http://localhost:8787. - Visit http://localhost:8787/migrate to run the DO migrations.
- Visit http://localhost:8787/create to create a dummy user.
- Visit http://localhost:8787/users to fetch all the D1 and DO users.
We’re not doing anything with the posts, but similar to how userTable was imported and used in the SampleObject class, postTable operations too can be performed.
DO deployment
That’s all good, but what about when the app is deployed? Well, for that we’ll use GitHub Actions and hit the endpoint once the deployment is completed. Add the below step after the Apply D1 Migrations in workflow.yml
- name: Apply DO Migrations
  run: |
    sleep 10  # Wait for deployment to be fully ready
curl -X GET "https://do-d1-drizzle.flashblaze.workers.dev/migrate"- https://do-d1-drizzle.flashblaze.workers.dev is the URL where your Worker is deployed
And we’re done! With this we can now safely use the same schema for D1 and DO.
Useful links
- https://github.com/flashblaze/do-d1-drizzle - GitHub repo for this blog post
- https://github.com/neondatabase-labs/cloudflare-drizzle-neon/blob/main/migrate.ts - referring the
.dev.vars - https://github.com/drizzle-team/drizzle-orm/discussions/1545#discussioncomment-8689233 - this comment led me to the below blog post
- https://kevinkipp.com/blog/going-full-stack-on-astro-with-cloudflare-d1-and-drizzle - how to use
drizzle-kit studiowith local DB
NOTE
By the time this post is published, the Worker URL might not be reachable since I’ll be removing it.